

How To Change Background Color In Sketchup
Customizing a Model's Groundwork with Styles
Your model's mode contains background settings. To customize a model'due south groundwork, you can choose the groundwork, sky, and footing colors or employ a photo background.
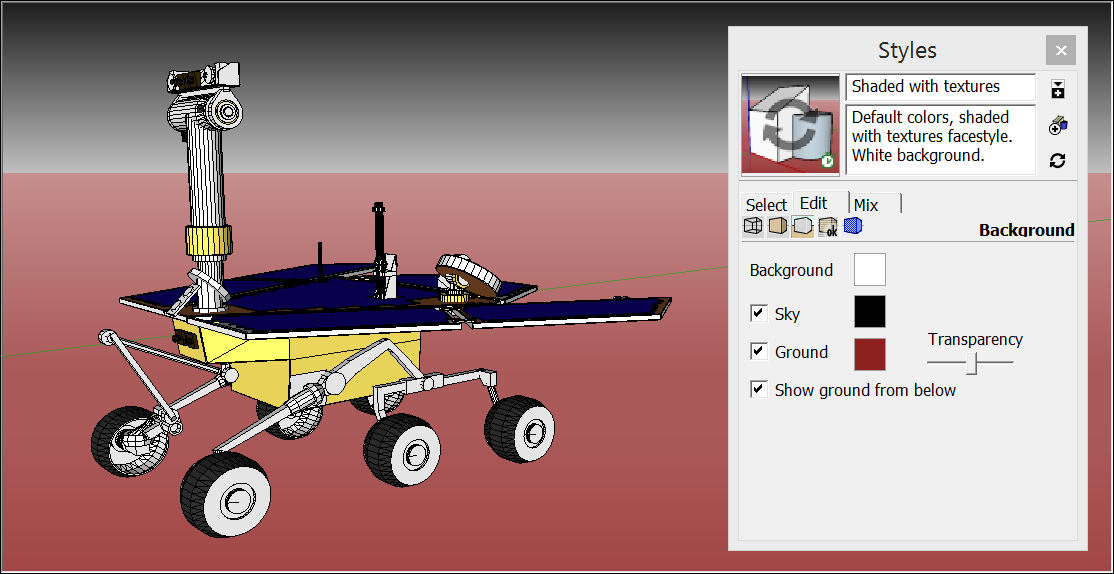
In the figure, the background colors make the infinite rover model appear to be somewhere Mars-like.
You lot could also create a obviously white background, if that'due south what your model needs.
To customize the background colors in your own model, follow these steps:
- Mac - Select Window > Styles to open the Styles panel.
Windows - Open the Styles dialog box in the Default Tray - Select the Edit tab.
- Select the Background Settings icon (
 ) just beneath the tab name.
 - Cull your desired background, sky, and ground options. Here'due south a quick look at each i:
- Background colour swatch: Click this color swatch to select a new background color.
- Sky checkbox: Select the Heaven checkbox to have a sky color that is different from the groundwork color. Click the color swatch to select a sky color.
- Footing checkbox: Select the Ground checkbox to choose a basis colour that is different from the background colour. Click the colour swatch to select a ground color.
- Transparency slider: Slide the Transparency slider to arrange the level of transparency for the ground airplane. Drag the slider toward the left-most position to minimize below-ground visibility. Elevate the slider toward the right-nearly position to maximize below-basis visibility.
- Show ground from below checkbox: Select or clear this checkbox to toggle the display of the ground plane from viewpoints below the horizon.
- (Optional) Click the Update Style push button (
 ) in the tiptop-right of the Styles console. Clicking this push updates the copy of the currently active style in the In Model styles. See Managing In Model Styles and Collections for details about In Model styles.
Tip: With a groundwork photo, your model can display a detailed and realistic groundwork without backlog geometry that might ho-hum SketchUp's performance. You tin insert the background photo equally a watermark, as explained in the following steps, or project an prototype texture onto a face, as explained in Applying Colors, Photos, Materials, and Textures.
To insert a static groundwork photo, place the paradigm as a watermark. Hither'due south how it works:
- Select Window > Styles. Open the Styles dialog box in the Default Tray.
- In the Styles panel, select the Edit tab and and then click the Watermark Settings icon (
 ).
). - Click the Add Watermark icon (
 ).
). - In the Choose Watermark dialog box that appears, navigate to the image you want to use as a background. After yous select an image, the Create Watermark dialog box appears.
- Give your watermark a name and select the Background radio button. Then click Side by side.
- Leave the Create Mask checkbox cleared, unless you're familiar with creating photograph masks. Use the Blend slider to brand your background paradigm watermark more or less transparent. Click Adjacent.
- Choose how you lot'd like your background prototype watermark to appear. Here'southward a wait at your options:
- Stretched to fit the screen: You image fills the background. Clear the Lock Attribute Ratio checkbox if it'south okay to distort your image to fill the entire background.
- Tiled beyond the screen: Employ the Calibration slider to prepare the tile size.
- Positioned in the screen: Click a radio button to select the positioning. Use the Scale slider to set the epitome size.
- Click Cease to apply your options.
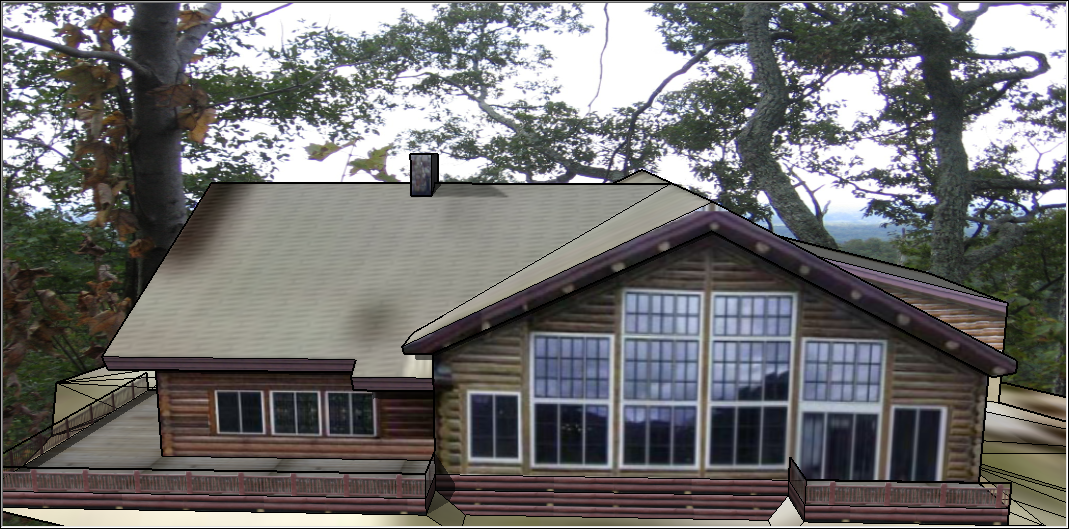
In the following figure, a photograph of woodland scene is placed as a background paradigm watermark. For details nearly using watermarks for branding and editing watermarks, see Watermarking a Model.

How To Change Background Color In Sketchup,
Source: https://help.sketchup.com/en/sketchup/customizing-models-background-styles
Posted by: martinhignisfat.blogspot.com
0 Response to "How To Change Background Color In Sketchup"
Post a Comment