

How To Change The Background Color In Gimp
GIMP is similar to Photoshop and nigh photographers/designers use it for editing the photos. When it comes to irresolute or replacing colors in GIMP, it has a vast variety of options that can be used for this specific chore. Colors in a photograph is an important thing that can change the look of the unabridged image. Nevertheless, there are several dissimilar reasons why a user will desire to alter or replace colors for their images. In this article, we are going to show some of the basic methods that y'all can utilise for changing and replacing colors in GIMP.
Using the Buck et Fill Tool to Change Colors
But like in nearly programs, the bucket tool is commonly used for adding/irresolute colors of the area in the image. Most users are familiar with this tool considering it is also used in Microsoft Pigment, which is one of the near mutual programs. The saucepan tool will work all-time with the solid colors merely, but not with the color that has patterns. Follow the below steps to endeavor it out:
- Open your GIMP application, click on the File menu, and choose Open pick. Locate your image file and open information technology.
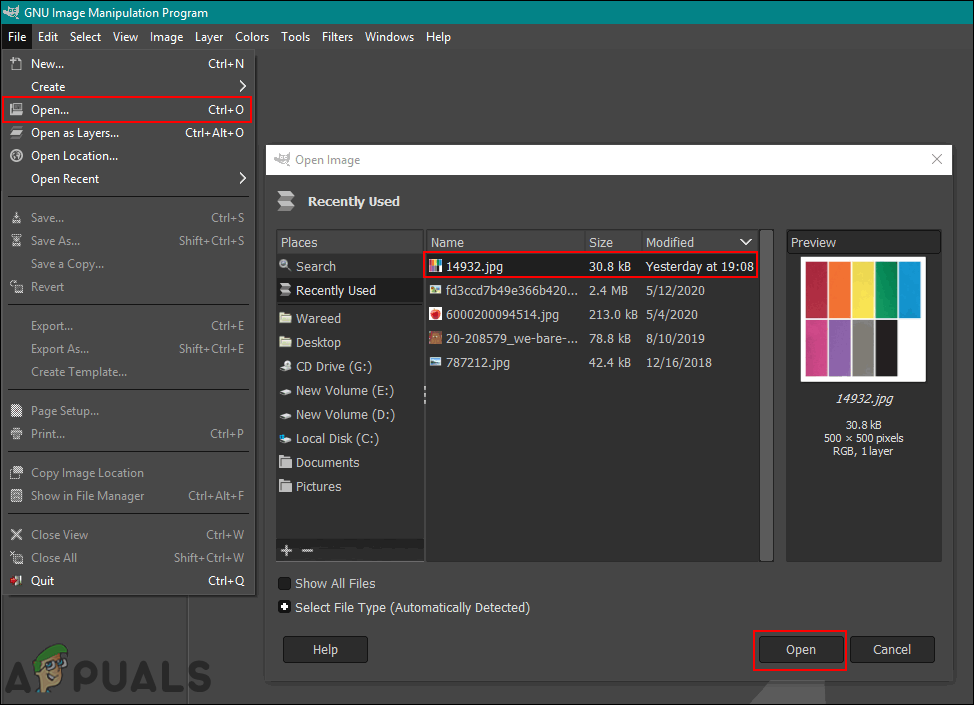
Opening file in GIMP - Click on the active foreground color on the left side and choose a colour that you desire to add.
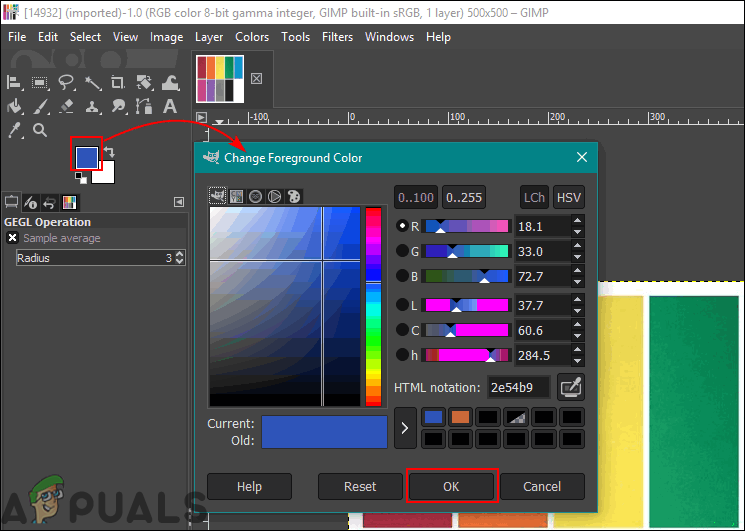
Changing the foreground color in GIMP - Now select the bucket fill tool and click on the solid colour to change the color to the one you chose for foreground color.

Using the saucepan tool to change colors - You can also use the Select tool to select any of the areas then apply the Bucket tool to add the color in that area.
Annotation: You can as well create another layer earlier using the option tool.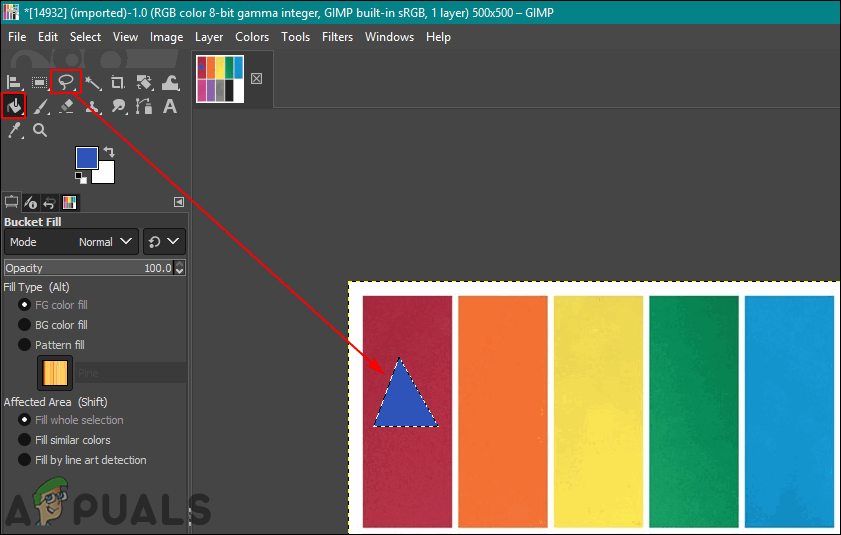
Changing color for the selected area with the saucepan tool - This volition change the colour in your image, you tin always disengage by pressing the CTRL + X keys on your keyboard.
Using the Color Residue and Colorize to Change Colors
The color balance tool is used to modify the color residual of the selected surface area or layer of the paradigm. This tool is mostly used for correcting the predominant colors in the digital photos. The colorize is some other like tool that can help with changing the Hue/Saturation and lightness of the prototype. These ii tools are used for changing the colors of the image chop-chop within few steps. Follow the below steps to change the color of the image:
- Open your image in the GIMP program by using the open pick in the File menu.
- Click on the Colors menu in the menu bar and cull the Color Balance choice in the list. Hither you can modify the color levels bars to change the colour on the epitome.
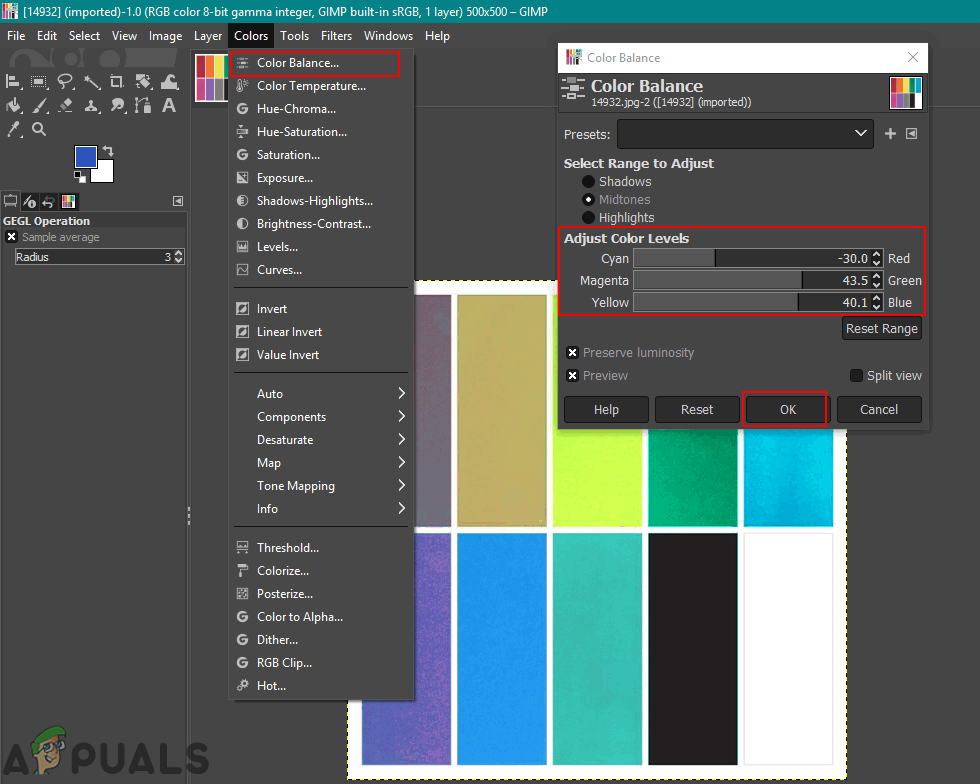
Using the color balance to change colors - You tin also click on the Colors carte in the card bar and choose the Colorize option. Here you tin can choose a specific color and and so change the bars to utilize that color with dissimilar options.
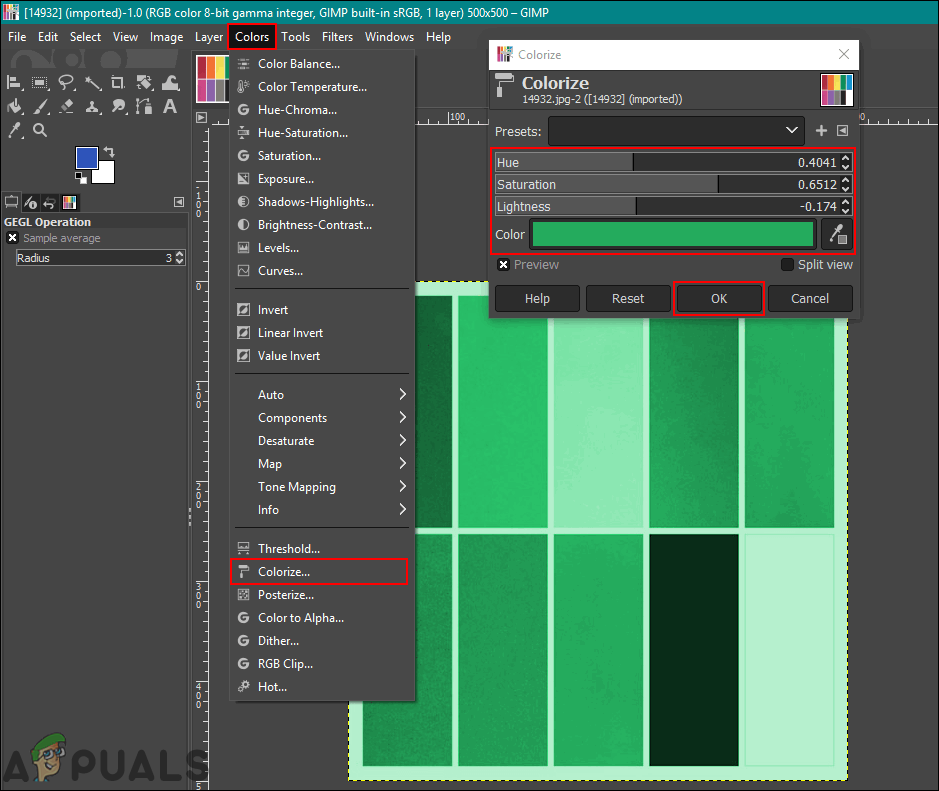
Using the colorize option to alter colors - One more thing yous can try is applying these color options for a specific object. You need to use one of the Select tools and select the expanse for the colour irresolute.
Note: You lot tin can also create a new layer of the original image before trying the option of the area/object.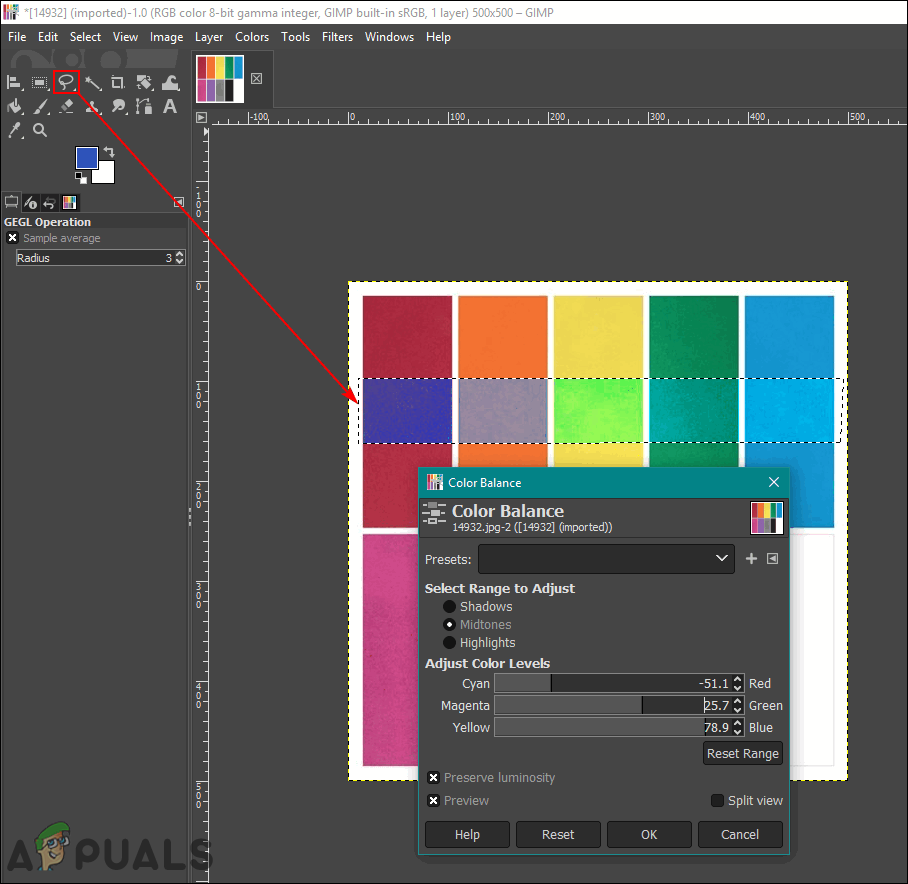
Using colour residual for selected area only - At present choose whatever of the above options to change the color of the specific expanse.
- Once yous are done, you tin further work on the image or click on the File bill of fare, cull the Export option to relieve the epitome.
Using the Color Exchange Option to Replace Colors
This method is used for replacing the solid color pixels from 1 color to another. It will by and large change all the pixels of one color to another color. However, if the prototype has some pixels that are different from the color you choose, it won't change those pixels to another color. Make certain that the pixels you are irresolute are in a similar colour. This works better for the solid colors used in the image. Follow the below steps to try it out:
- Open the Epitome or Create a new image in GIMP by clicking the File card in the carte du jour bar.
- Click on the Colors menu in the card bar, select the Map option, and choose Color Exchange selection in the list.
Note: Make sure that the RGB selection is selected in theMode selection of Paradigm bill of fare.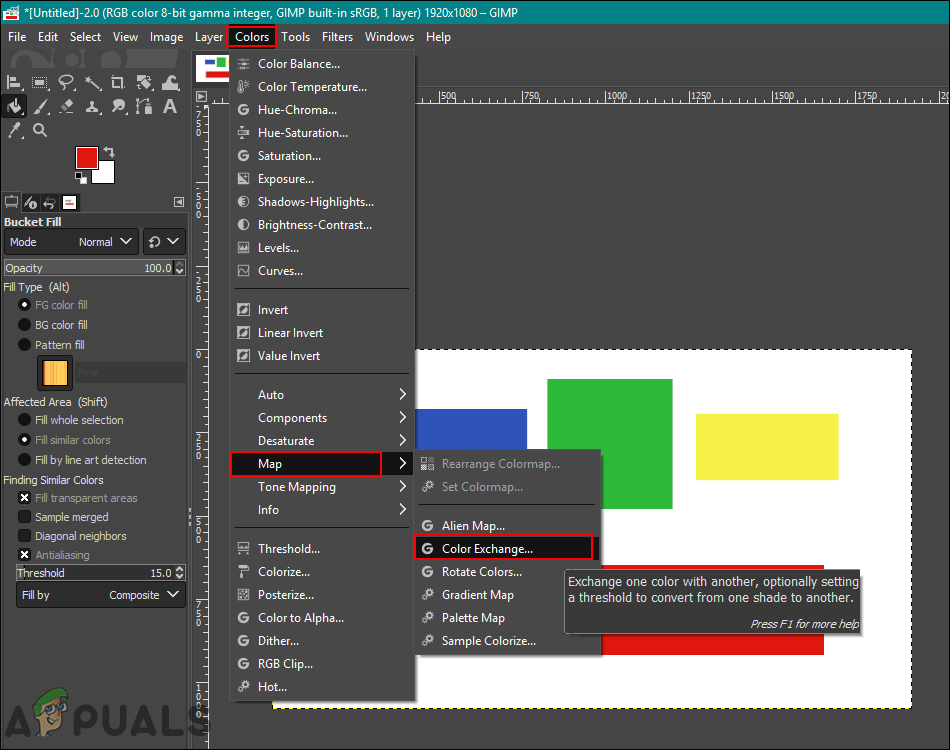
Opening the Colour Commutation pick - Here y'all tin alter the From Color and To Colour to whatever colors you lot want to replace to your selected colors. You tin can too use the Pick Color tool next to it to select the specific colour on image.
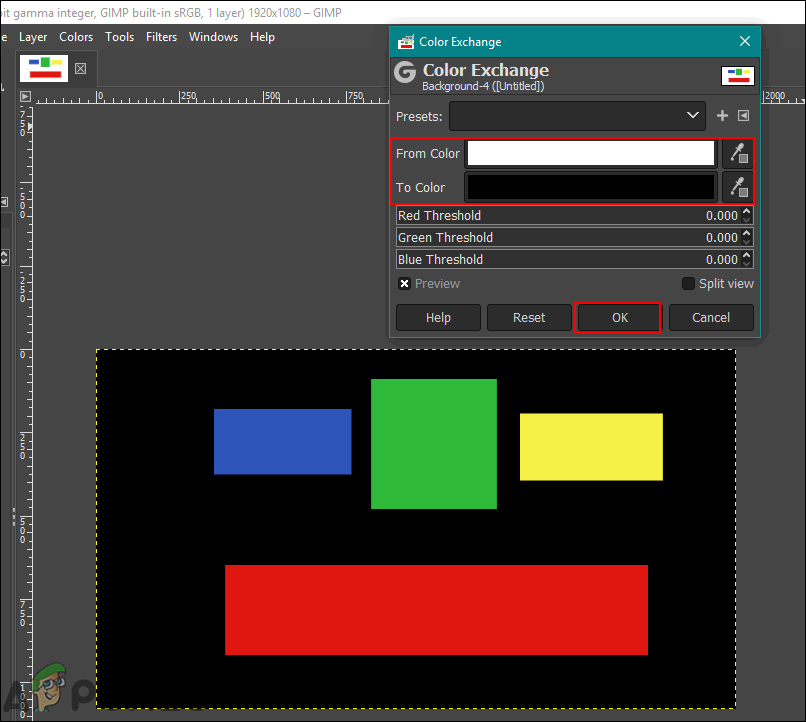
Using the colour substitution selection to completely change one colour to some other - One time you are done with replacing colors, click on the Ok button to utilize the changes.
There are many more ways that you can use for changing the colors on the photos in GIMP. Information technology all depends on what kind of changes and tools you want to use. Some may only require the Hue/Saturation option for the quick changes and some may use the Brush Tool for coloring the specific surface area in a photo. Every choice in GIMP for colors will have different benefits depending on the image. Users tin play around with a different option to cheque what they demand for themselves. Nearly of the options for color changing and replacing will be found in the Colors menu in the menu bar.
![]()

Source: https://appuals.com/change-or-replace-colors-in-gimp/
Posted by: martinhignisfat.blogspot.com
0 Response to "How To Change The Background Color In Gimp"
Post a Comment